


If you want to slice, dice, or chop like a chef, your first step is to learn how to hold a knife correctly. The most effective way to hold a chef’s knife is with a secure grip where your thumb and forefinger pinch the blade, while your other fingers wrap around the handle. This grip gives you more control and helps prevent dangerous slips, making your prep safer and more efficient.
Good knife skills start with safe habits and the right grip. Even simple meals get easier to prep when you have the basics down. With a bit of practice, your cuts look cleaner, your hands feel steadier, and kitchen work just goes faster.
When you use a knife, you need to know how to safely hold it, use the right grip, and keep your hand steady. Understanding the parts of the knife and how your hand should rest on it can help you cut food more easily and safely.
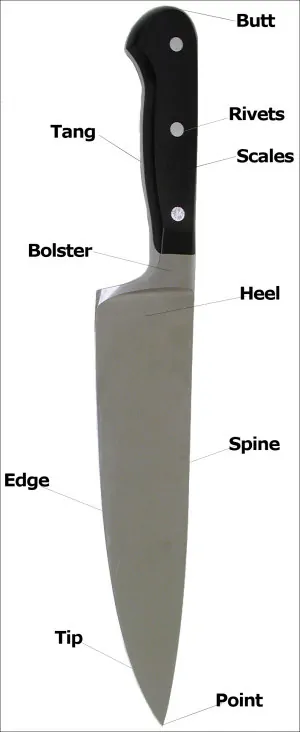
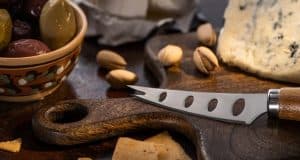
Every part of the knife has a job. The main sections are the blade, handle, tip, spine, edge, heel, and bolster. Most kitchen knives, like the chef’s knife or Japanese Gyuto, have a broad blade and a sturdy handle for chopping.
The blade is the sharp metal section that cuts. Some knives, such as the Gyuto, have a double bevel, which means both sides are ground down. Others, like some Japanese knives, may have a single bevel.
The handle is where your hand grips. Good knives have handles that feel comfortable and secure, even when wet. Knowing the difference between knife types, like the small paring knife and the heavier chef’s knife, helps you choose the right tool for each task.
The bolster is the thick part between the blade and handle on some knives. It adds balance and safety. Understanding where each part is will help you position your fingers correctly and use your knife more efficiently.
| Knife type | Ideal grip |
|---|---|
| Chef’s knife | Pinch grip |
| Japanese Gyuto knife | Pinch grip |
| Paring knife | Handle grip |
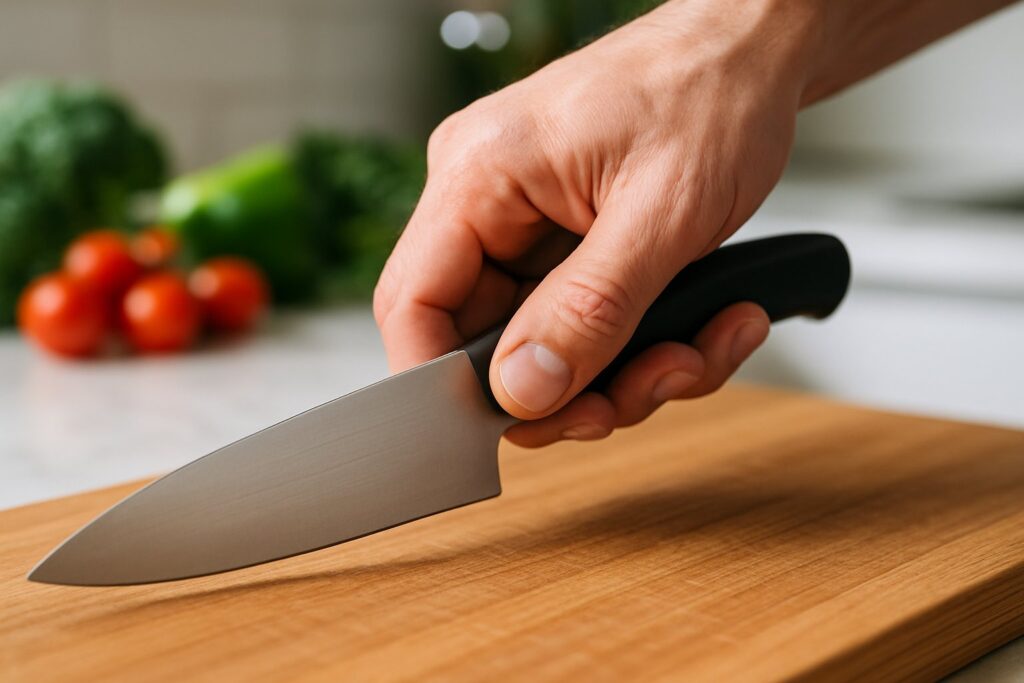
The way you grip your knife affects control and safety. For most kitchen tasks, the pinch grip works best. Pinch the blade where it meets the handle using your thumb and side of your index finger. The rest of your fingers curl around the handle.
This grip gives you better control and helps guide the blade accurately. Beginners often use the handle grip, wrapping all fingers around the handle. This is easier to learn but offers less control for fine cutting. The pinch grip is widely used by chefs because it feels natural once you practice it for a while.
For small knives like paring knives, a handle grip is usually fine because you do not need as much force or control for light tasks.
Finger placement is as important as the grip itself. Your thumb and index finger should be on opposite sides of the blade in a pinch grip, just above the handle.
The rest of your fingers wrap firmly around the handle. It’s important to keep your fingertips curled under your guide hand—the hand holding the food. This keeps your fingers safe.
Keep your guiding knuckles facing the blade edge. Use your knuckles as a guide for the side of the blade, letting the edge glide up and down. Don’t spread your fingers out; crowding the blade keeps your hand safer.
If you use a handle grip, keep all fingers closed around the handle and tuck them in. Letting any part hang loose can make you lose control of the knife.
Control comes from how you hold the knife and position your hand. Use a firm but relaxed grip; don’t squeeze the handle too tightly, or your hand will get tired quickly.
Stability also depends on your cutting surface and body posture. Stand with your feet shoulder-width apart and the board steady. Hold the knife so the blade’s edge stays in contact with the board as you cut.
Let your shoulder, arm, and hand move together in a smooth motion. Try not to use only your wrist or fingers. This reduces strain and keeps your movements safer.
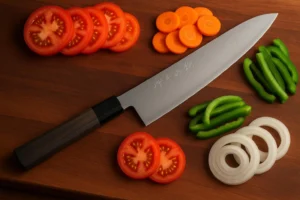
Always slice using a rocking or smooth forward-back motion when using a chef’s knife. This lets you use the whole blade for cutting and helps you control the depth of each cut.
To handle different cutting tasks well, you must know the right way to move your knife for each job. Understanding the best techniques will help you become faster, safer, and more accurate in the kitchen.
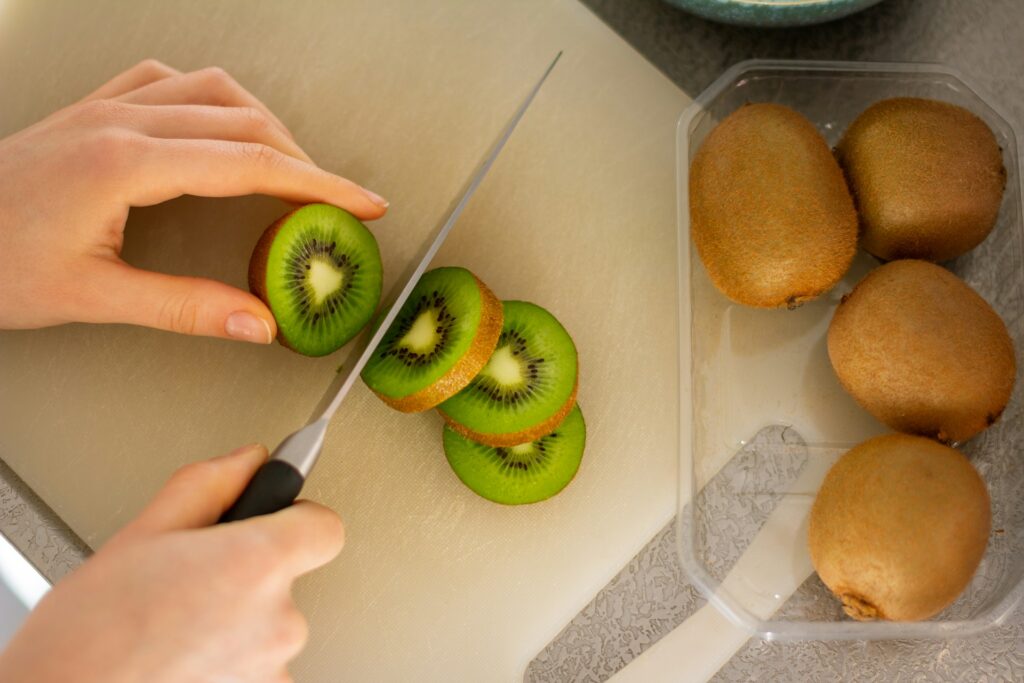
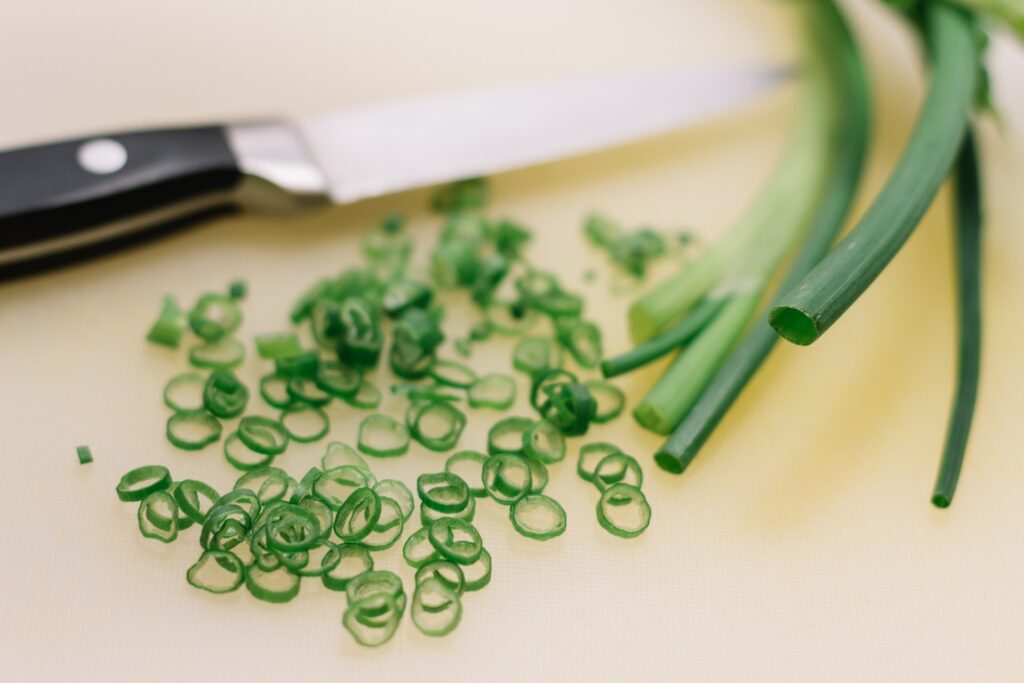
The rocking motion is often used for slicing vegetables, fruits, or herbs. To do this, set the tip of your chef’s knife on the cutting board and keep it in contact with the board as you work. Hold the handle firmly with your dominant hand and use your other hand to guide the food into the blade.
Move the knife handle up and down in a slight arc, pushing the blade back and forth while the tip stays down. This helps you slice foods like cucumbers, carrots, or onions smoothly. It also reduces the risk of slipping, so it can be safer, especially for beginners.
The rocking technique works best with a chef’s knife and less with a cleaver, which is heavier and shaped differently. Practicing with an angle cube or ruler can help you keep your slices even and your cuts neat. For a visual guide, watch this knife rocking motion demonstration.

Chopping and dicing require control and attention to detail. Start by using your knife skills to cut even planks, sticks, and cubes. Use the “claw grip” with your guide hand to keep your fingers curled under and away from the blade.
Hold your knife so the blade is straight up and down at a 90-degree angle to the cutting board. Push the blade through the food using a gentle up-and-down motion. Push the cut pieces away as you continue chopping.
For fine dicing, first cut food into slices, then turn and cut those slices into small sticks. Finally, dice the sticks into even cubes. If needed, a chef’s knife is the most versatile for these tasks, but a cleaver can also chop larger foods. Chopping in small batches gives you better control and speed.

Mincing makes food very fine, like when you prepare garlic, onions, or herbs. First, slice your food thinly with your knife. Then, gather the slices into a pile. Hold your knife handle with one hand, and place the fingertips of your other hand curled up and resting on top of the knife blade for stability.
Work the blade in a repeated rapid, rocking motion, moving the tip up and down, and sweep through the pile. Keep your free hand on top of the blade, never too close to the cutting edge.
Mincing can be safer by moving slowly at first. As you build confidence, speed will increase. Try this method with both a chef’s knife and, if you need to mince tough foods, a cleaver.
Good knife skills start with selecting the right tool and taking regular care of it. By choosing wisely and keeping your knife sharp and protected, you can make food prep quicker and safer.
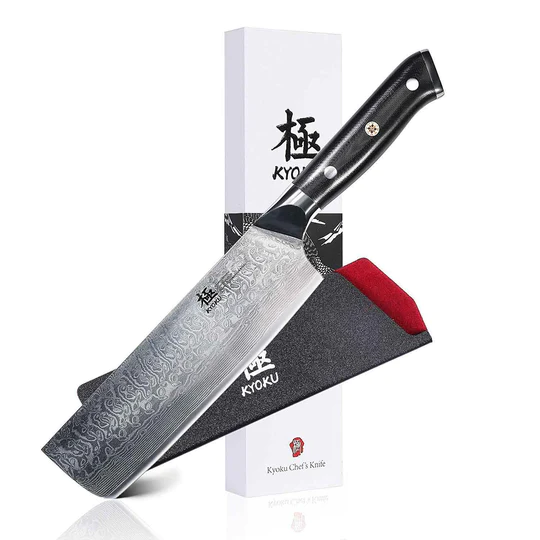
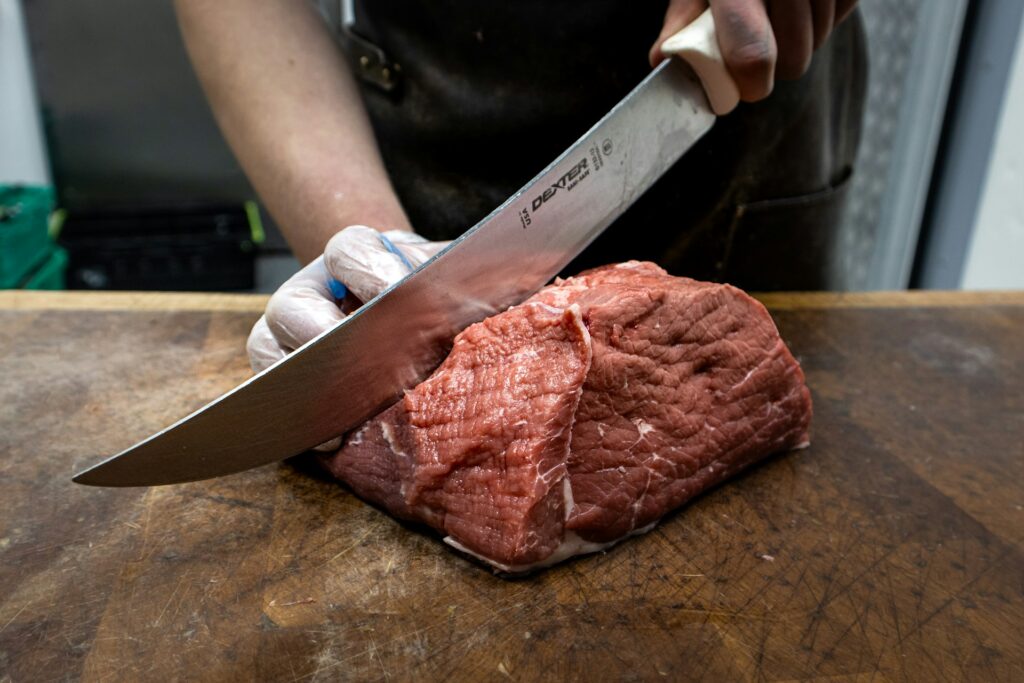
Using the right knife matters for both safety and performance. For most kitchen jobs, a chef’s knife works best because it is versatile and suits chopping, slicing, and dicing. If you’re slicing bread, a serrated bread knife is better since the grooves can cut through crusty surfaces without crushing your loaf.
For peeling or detail work, use a paring knife due to its small size and control.

Boning knives are thin and flexible, making them great for removing bones from meat or fish. Keep these knives separate and use each for their intended purpose to avoid damage.

Look for knives with a comfortable grip and a balanced feel in your hand. Stainless steel and high-carbon steel are popular choices for their durability and sharpness. If you prep a lot, consider a lightweight knife for less fatigue.

Caring for your knife keeps it sharp and extends its life. Always wash knives by hand using warm, soapy water after each use. Avoid the dishwasher, as harsh detergents can dull or pit the blade. Dry your knife right away to prevent rust.
Sharpening is key. Use a whetstone, honing rod, or professional sharpening service when your knife feels dull. Honing rods help maintain the edge between full sharpening by straightening the blade. Sharp knives cut more precisely and are safer since you use less force.
Check blades for chips or damage frequently. If a knife handle becomes loose or the blade shows deep nicks, replace it for safety. Always cut on wood or plastic boards, not metal or glass, to keep the edge intact.

Safe storage prevents accidents and protects the blade. A dedicated knife block keeps knives handy and separates each blade.

Magnetic strips on a wall can store knives safely while saving space and showing the blade for easy access.

Keep knives out of drawers without protection, as tossing them in with other utensils can dull or chip the blade. If you need to use a drawer, use a knife guard or a drawer organizer made for knives.

If you travel or cook outside your kitchen, use a knife roll or sheath to carry knives. This stops them from moving and protects both the blade and your hands. Always store knives clean and dry to avoid rust or bacteria build-up.

When you use your knife the right way, you get better results and avoid cuts. A few key habits can make your food prep faster, safer, and more enjoyable.
Honestly, the first thing you want to do is grab a sharp knife. Dull ones? They slip and can nick you before you even realize it. Try holding your knife with a pinch grip: thumb and index finger on the blade just ahead of the handle, the rest of your fingers curled around the handle. It feels a bit odd at first, but you’ll notice the extra control pretty quickly.
Set yourself up on a flat, steady surface. If your cutting board keeps sliding around, just toss a damp towel underneath—it works like magic. Always cut away from your body, not toward it.
Instead of forcing the knife down, use a gentle rocking motion when you cut. It’s safer and, honestly, your slices look neater. Keep your knives clean and dry. It helps them stay sharp. For storage, a block, magnetic strip, or even a simple knife guard does the trick. And sharpen your knives a few times a year with a sharpening stone. It’s worth it.
| Habit | Why it works |
|---|---|
| Use a damp towel underneath | Stops the board from sliding |
| Cut on wood or plastic | Protects knife edge |
| Use the claw grip | Protects your fingers |
Always grab a sturdy, non-slip cutting board. Wood or plastic is the way to go—glass looks cool but will ruin your knife edge in no time.
Keep the board close so you don’t have to reach awkwardly. Use your non-dominant hand as a guide: curl your fingertips under, and let your knuckles guide the blade. This so-called “claw grip” keeps your fingers safe and your cuts even, or at least safer than the alternative.
For round or wobbly foods, cut them in half first to make a flat side. It just feels more stable. Wipe down your board between ingredients to keep things clean and avoid any weird flavor crossovers.
Don’t just grab the handle and go. The pinch grip gives you way more control. If you let your fingertips stick out or hover above the blade, you’re asking for trouble.
Skip using dull knives. They slip, and honestly, sharpening only takes a few minutes. Never pry open cans or try to hack through bones with your kitchen knife—you’ll regret it when the edge chips or bends.
And please, don’t cut straight onto plates, glass, or your countertop. Even the best knives get dull fast that way. After each use, just wash and dry your knives—it only takes a second and helps keep rust away.
The pinch grip is where it’s at. Put your thumb and the side of your index finger on the blade itself, right in front of the handle. The rest of your fingers wrap around the handle. This gives you balance and lets you steer the blade easily.
The pinch grip, with your thumb and index finger on the blade, lets your wrist and hand move naturally. You get way more control and precision. Most chefs swear by it over just holding the handle.
Keep your fingertips curled in on your guiding hand so your knuckles touch the blade’s side. Tuck your thumb and pinky in, too. Always use a sharp knife because dull blades are more likely to slip.
Practice the pinch grip and use your non-cutting hand as a guide. Go slow at first and focus on controlling the blade. Start with easy stuff like carrots or cucumbers. It builds confidence for cutting larger, more dense vegetables, and large pieces of meat.
If you really have to hold a knife for self-defense, grip it firmly with your thumb on top or alongside the handle. Don’t squeeze too hard or your hand will tire out fast. Still, it’s not a great idea unless you’re trained and have no other choice.
Hold the knife by its handle, blade pointed down, with the sharp edge facing away from you. As you walk, keep your arm relaxed and straight—don’t rush. If you need to pass the knife to someone, always hand them the handle, not the blade. Simple, but it’s surprising how often people forget.